As the death toll and the infected cases of widespread coronavirus continue to increase, global organizations and the tech industry has come forward with technology like blockchain to fight coronavirus.
Along with the equipment and monetary support, technology also withstands against the virus with better plans and solutions. Hence, tech industries have started leveraging blockchain technology in the wake of a global health emergency.
Blockchain Helps In Real-Time Online Tracking
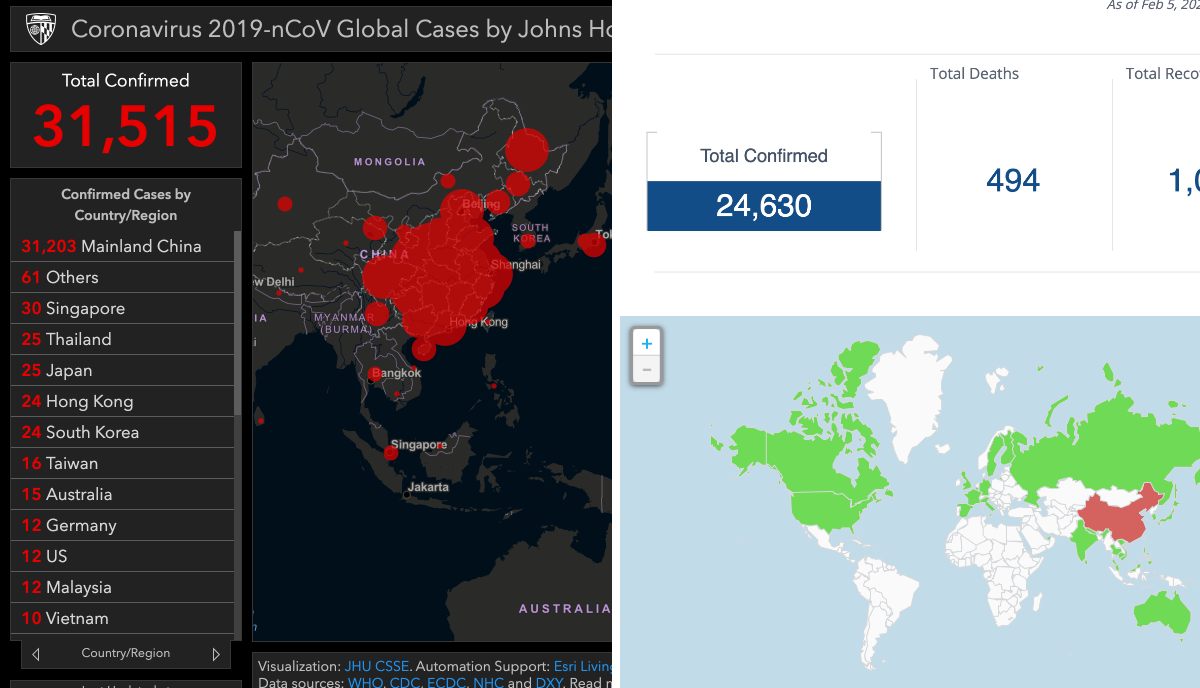
The Center for Systems Science and Engineering has already set up an online platform to track coronavirus and visualize the growing number of infected patients in real-time.
But Acoer, an Atlanta-based blockchain app developer, has also launched an alternative online data visualization tool to easily trail and depict the Cororanvirus outbreak using blockchain technology.
Acoer platform, named HashLog, is more advanced and clear as it pulls the data from the Hedera Hashgraph database using the HashLog data visualization engine.
Hedera Hashgraph is an immutable, transparent and decentralized database based on distributed ledger technology that provides synchronized and unchangeable data from the public networks.
Moreover, researchers, scientists, and journalists can use the HashLog dashboard to understand the spread of the virus and act against it swiftly.
For data sources, Johns Hopkins CSSE extracts data from WHO, CDC, ECDC, NHC, and DXY. On the other hand, Acoer maps the public data, including data from the Center for Disease Control (CDC) and the World Health Organization (WHO). Therefore, data may differ on both platforms.
Blockchain Can Help Monitor And Control Money Flow
To fight the further spread of the coronavirus (2019-nCoV) outbreak globally, China has also received abundant monetary support from the international community to create better action plans.
China's govt-led organization and charities are responsible for overseeing and utilizing the influx of money to research and generate a solution for coronavirus. But due to the lack of coordination and mismanagement among the various organization, money is not being laid out to curb the crisis.
Recently, a paper published by Syren Johnstone, from the University of Hong Kong, discusses the problems encountered by charities, in China and elsewhere. It argues that the present crisis should be seen as a call to arms.
Syren urges for a borderless solution with better management of donations and implementation using the emerging tech like Blockchain and Artificial Intelligence.
Keeping that in mind, Hyperchain, a Chinese company, also announced blockchain-based charity platform to streamline the donation from all over the world.
Since the Hyperchain platform is based on the blockchain, it offers more transparency among the sender and receiver of funds to bring trust and immutability to restrict the transaction data deletion.
Overall, Hyperchain improves administrative function for the money and also extends the logistics actions.
@HACKER NT
Related posts